The #1 Food Photography Mistake That’s Killing Your Social Media
(And How to Fix It for FREE)
The #1 Food Photography Mistake That’s Killing Your Social Media (And How to Fix It for FREE)
Ever Taken a Food Pic That Looked... Kinda Terrible?
You know the feeling. You just finished plating the perfect dish. The colors pop, the textures are on point, and the steam rising off the top is chef’s kiss 👌.
You take a step back, admire your work, and think: I gotta show this off.
So you grab your phone, snap a quick pic, and…
Ugh. 😬
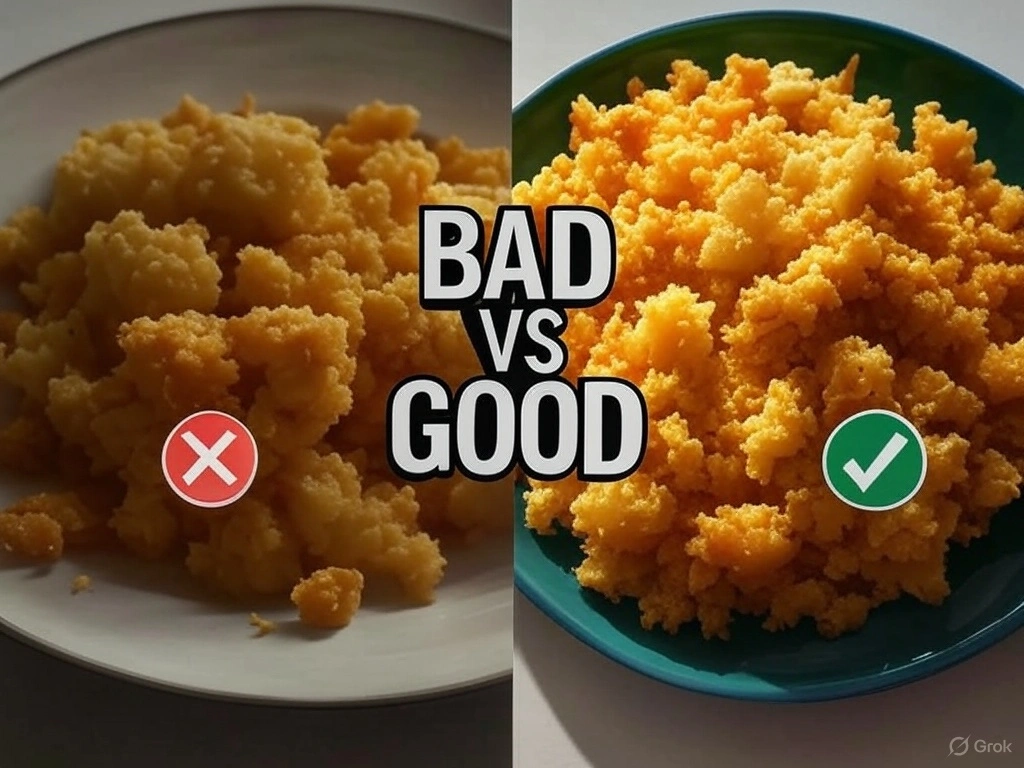
The colors are dull. The details are lost. Somehow it looks cold—like it’s been sitting out all day. Instead of mouthwatering, it’s just… meh.
But here’s the thing—you’re not alone. This happens to restaurant owners all the time. And the good news? It’s not your food. It’s not your phone. And it’s definitely not your fault.
It all comes down to one simple mistake that’s wrecking your photos—and once you know how to fix it, you’ll be taking pro-level food pics in seconds.
And nope, you don’t need a fancy camera, expensive lights, or a photography degree to fix it. This trick is quick, free, and insanely easy.
Let’s get into it.
Why Bad Photos Hurt Your Business (Even If Your Food Is Amazing)
Here’s the hard truth: people eat with their eyes first.
It doesn’t matter how good your food tastes—if your photos don’t make people hungry, they’re not walking through your doors.
And bad lighting? It’s the fastest way to make delicious food look unappetizing.
There’s even a psychological reason behind this. Ever heard of the Halo Effect? It’s a fancy way of saying that people subconsciously associate bad photos with bad food—even when the two have nothing to do with each other.
On the flip side, even average food can look incredible in a great photo, making people think it tastes better.
That’s why pro food photographers charge thousands—because they know a good photo isn’t just a picture; it’s a sales tool.
But don’t worry—you don’t need to drop big money to fix this problem.
Because the real culprit behind bad food photos? Lighting.
The Secret to Instantly Better Food Photos (Without Spending a Dime)
Here’s the deal: bad lighting = bad photos.
And the biggest mistake? Relying on whatever light happens to be around.
Most restaurant lighting is too dim, too yellow, or too harsh, which makes food look weird and unappetizing. But fixing this is stupidly easy once you know what to do.
Ready for the secret?
Find a window with soft, natural light.
That’s it. No fancy equipment. No expensive gear. Just good old-fashioned daylight.
But not just any window—you need the right kind of light.
How to Find the Perfect Window for Food Photos
1️⃣ Look for a window where the sun isn’t shining directly through. Direct sunlight creates harsh shadows that make your food look weirdly dramatic (not in a good way).
2️⃣ Check for soft shadows. Hold your hand up in the light—if you see soft, diffused shadows, you’ve found the sweet spot. If the shadows are sharp and intense, try a different spot.
3️⃣ Place your plate near the window, but not in direct sunlight. This will give you that soft, natural glow that makes food look fresh and delicious.
💡 Bonus tip: If the light is still too strong, you can diffuse it even more by hanging up a thin white curtain or using a white napkin to soften the brightness.
That’s it. Seriously.
This one tiny tweak will drastically improve your food photos—making them look professional, polished, and totally drool-worthy 🤤.
Try It and See the Difference
Next time you make a dish that looks too good not to share, don’t just snap a pic under the nearest light. Take 10 seconds to find the right window, and watch how much better your photos turn out.
Your social media will thank you. Your engagement will thank you. And most importantly—your customers will thank you.
Because when your food looks as amazing as it tastes, people won’t just scroll past—they’ll crave it.
And if you found this tip helpful, make sure to check out [this other post/video] for even more ways to make your social media work for you instead of feeling like a chore.
Now go take some killer food pics! 🚀